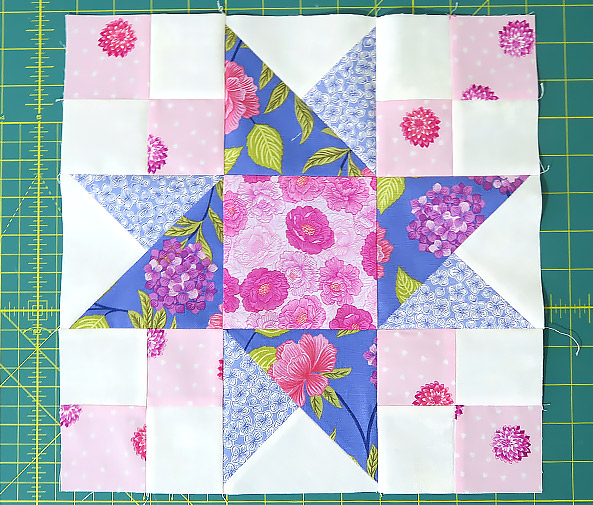
Who doesn’t like a slice of Key Lime Pie? Well, if you like Key Lime Pie, you’re going to love this Block. Fresh from the Sunshine State, it’s time to make your emerging quilt shine with another beautiful block this month.
BLOCK 8: Key Lime Pie
Finished Size 12″ (Unfinished 12-1/2″)

Key Lime Pie. No, it’s not the kind you eat, and this one’s not lime green either, although yours could be if you choose that colour. Whatever colour you make it this is the quilt block I’ve chosen for this month. It is another nine patch quilt block and is made from squares, half square triangles and quarter square triangles.
CUTTING
For this block you will need four different coloured fabrics. I have chosen lilacs and pinks in light and darks. I’m sure you’ll find some fabulous fabrics from your stash for this block

A. Eight 2-1/2″ x 2-1/2″ squares (White)
B. Eight 2-1/2″ x 2-1/2″ squares (Pink Spot)
C. Two 4″ x 4″ squares (Lilac)
D. Two 4″ x 4″ squares (White)
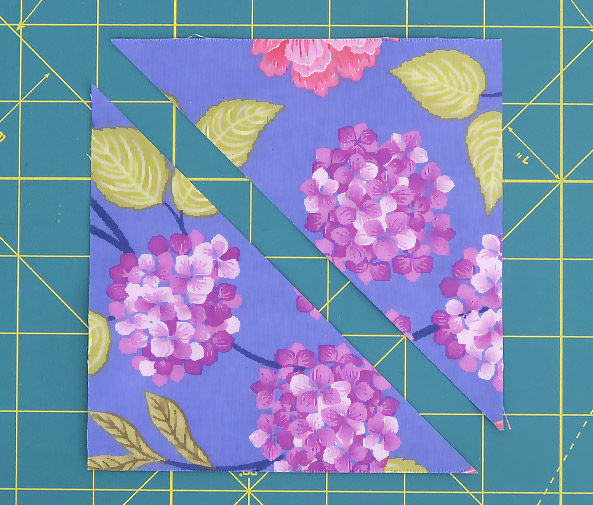
E. Two 5″ x 5″ squares (Large Lilac Flower)
F. One 4-1/2″ x 4-1/2″ square (Pink)
In this block the background fabrics are A & D.
BLOCK ASSEMBLY:
- All seams are 1/4″ and I use a stitch length of 1.8.
- As a rule, you would press your fabric seams towards the dark side (darker fabric). I finger press my seams before pressing with an iron. This allows you to change the seams’ direction if needed without stretching your fabrics.
- In bulky areas press your seams open as this will help reduce thickness.
We are going to begin by making the four corner units. This type of unit is known as a four-patch or checkerboard.
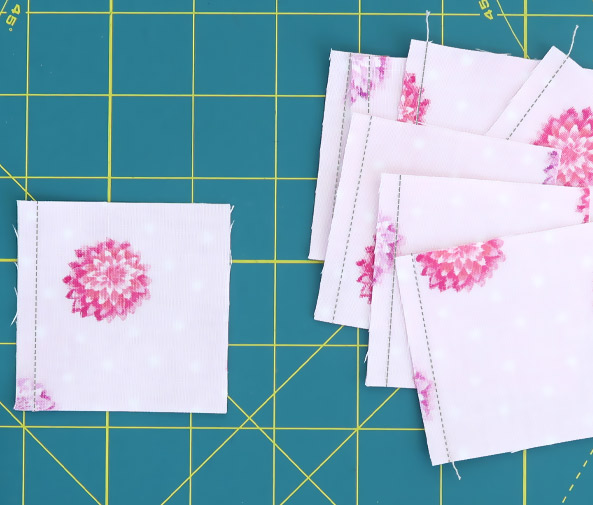
Take one 2-1/2″ square of white fabric (A) and one 2-1/2″ square pink spot fabric (B) and place right sides together lining up the edges and sew down the left-hand side.
Then open and finger press your seams toward the pink spot fabric before fixing with your iron.
Repeat this with another pair of A & B fabrics.
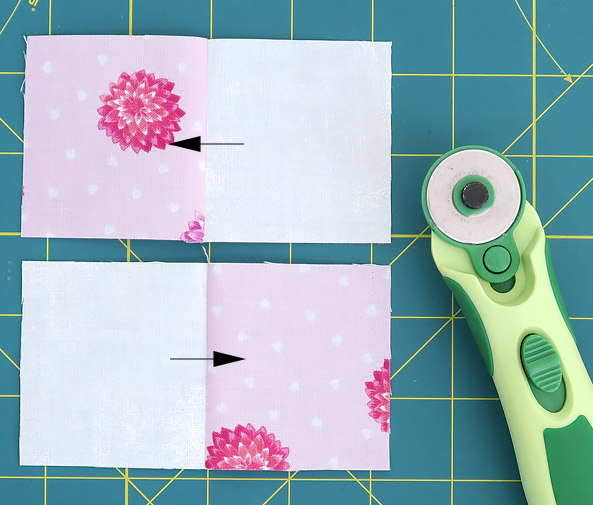
Next lay out the top left hand corner block so that the fabrics are lying the right way round then place one on top of the other with right sides together (RST). Nest your centre seams together then turn your fabric so that you start stitching down the right-hand side starting on the pink spot fabric.
Please note these units need to be sewn the same way to allow you to twirl your centre seams for a flatter finish.
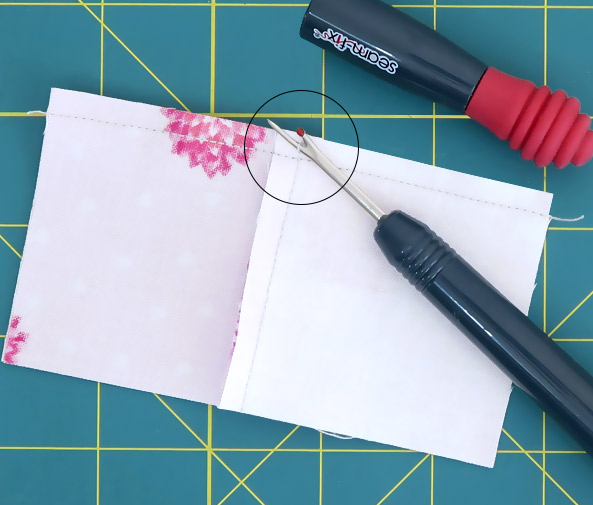
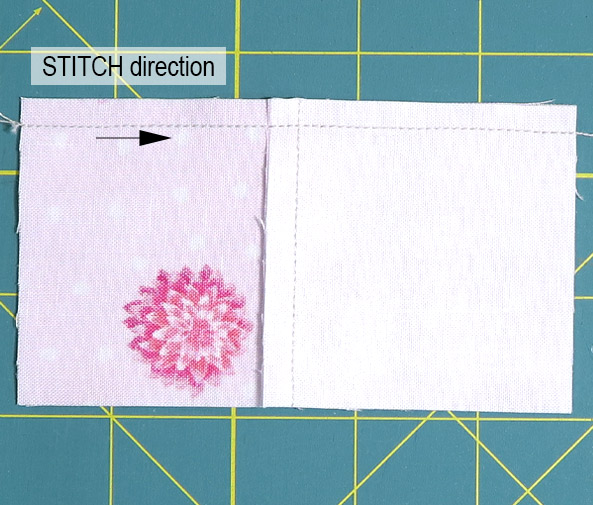
Before you open your four patch take your seam ripper and unpick the two or three stitches that lie above your horizontal seam. Don’t cut them, just unpick them. Do the same on the other side.
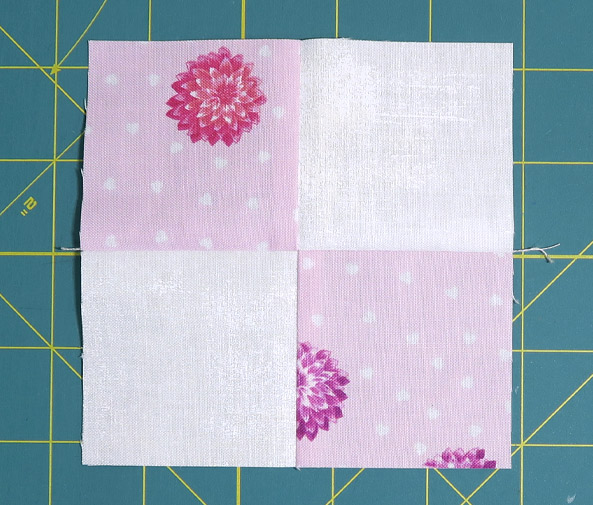
Turn your four patch over. All your seams should be pointing in a clockwise direction. Now press your block in a circle. As you get closer to the centre your seams should fall open to make a mini four patch in the centre. Press flat.
Now make three more four patch units.
Next we are going to make a ‘Split Quarter Square Triangle’ (SQST) unit. We are going to make these units slightly larger and then trim them to size for accuracy. SQST’s are also known as ‘Half Quarter Square Triangles’ (HQST), they are made from one half square triangle (HST) and two quarter square triangles (QST). Try getting your head around that one!
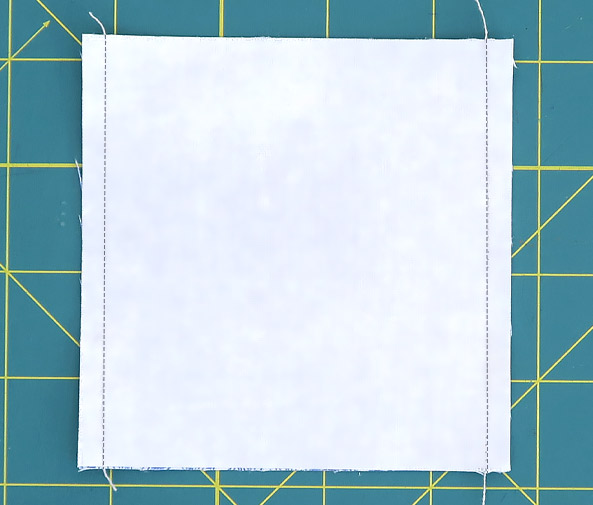
First the quarter square triangles. Take one 4″ square of white fabric (D) and one 4″ square of Lilac fabric (C). Place them RST, line up your edges and sew down the left and right-hand sides of the unit. Now place your unit with the white fabric (D) on top and cut diagonally from the top left corner point to the bottom right corner point.
Please note these units are directional and need to be cut the same way so that they are identical.
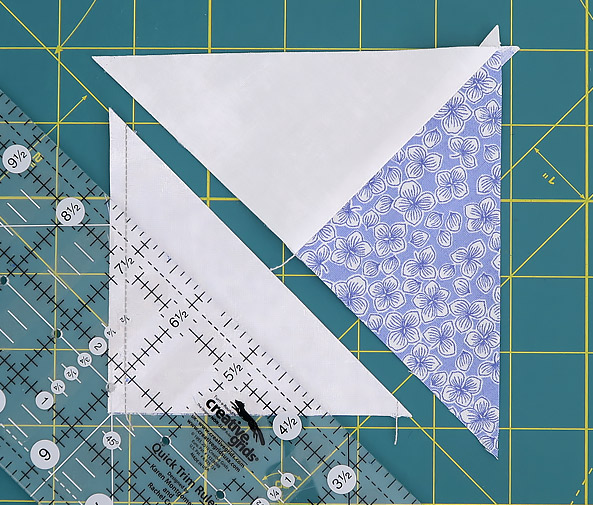

Now open out your quarter square unit. You may have to take out a couple of stitches on one of your points. Finger press your seams open before setting with your iron.
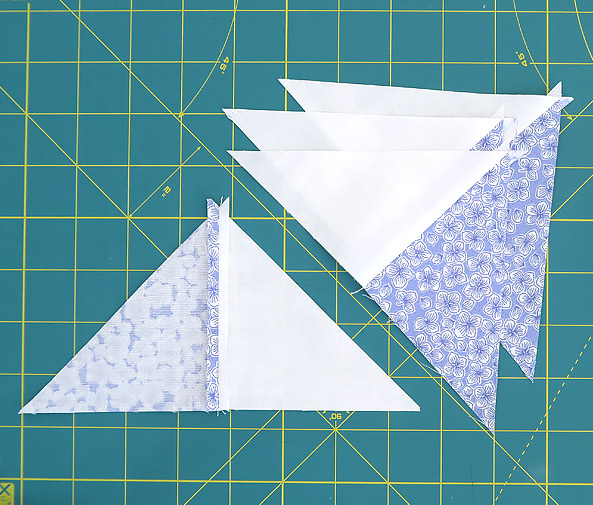
Repeat with the remaining C and D fabrics. You should end up with four QST pieces.
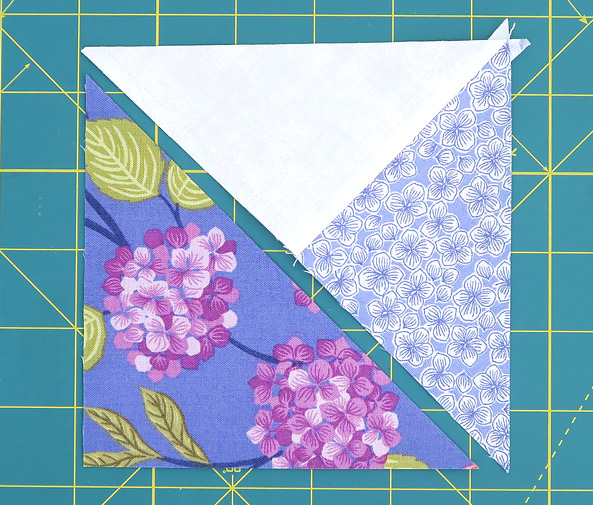

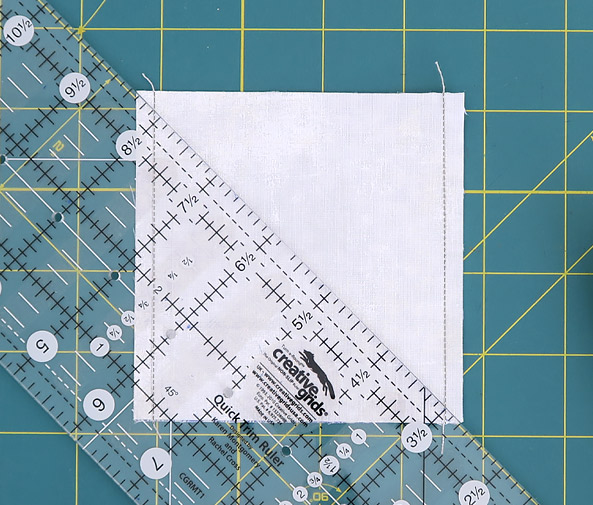
Take one of your 5″ square large lilac flower fabrics and cut diagonally to make two half square triangles (HST). Place one of these, RST on top of one of your QST’s aligning the bottom edge and making sure the point is aligned with the seam of your QST, see image above. Then sew along the bottom edge. Open out your unit and finger press your seam towards the large lilac flower fabric before fixing with your iron.
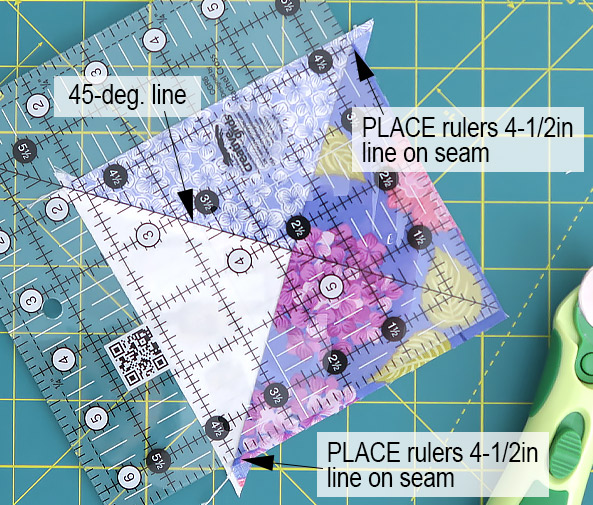
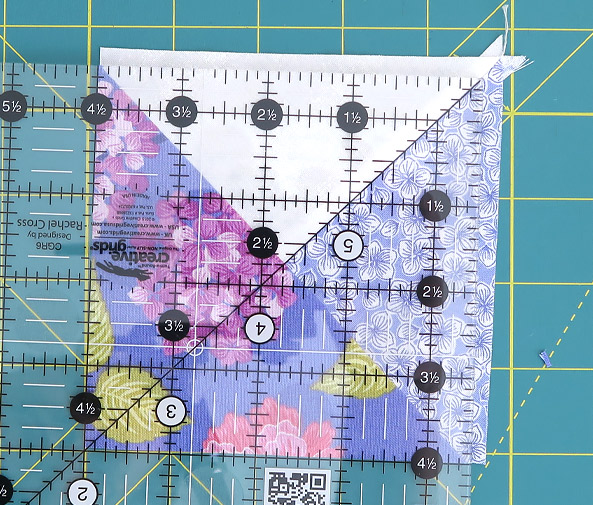

Now we need to square up our SQST unit. Place your ruler with its 4-1/2″ lines aligned on your HST seam line and your rulers 45-deg with your QST’s seam (see image above). Now trim away excess fabric. Now turn and repeat for the other two sides.
Make three more of these SQST units, giving you a total of four.
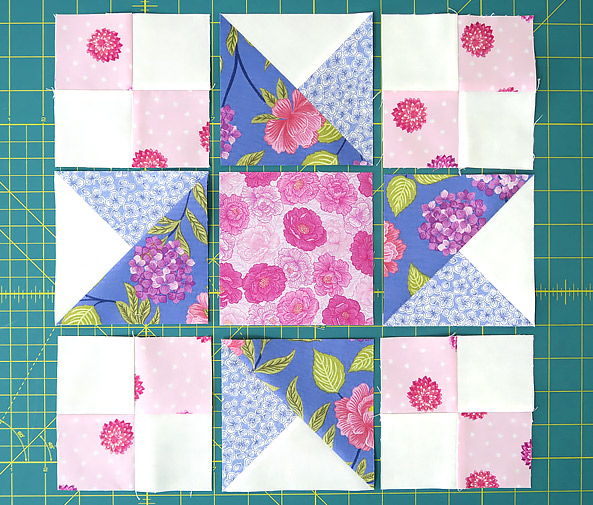
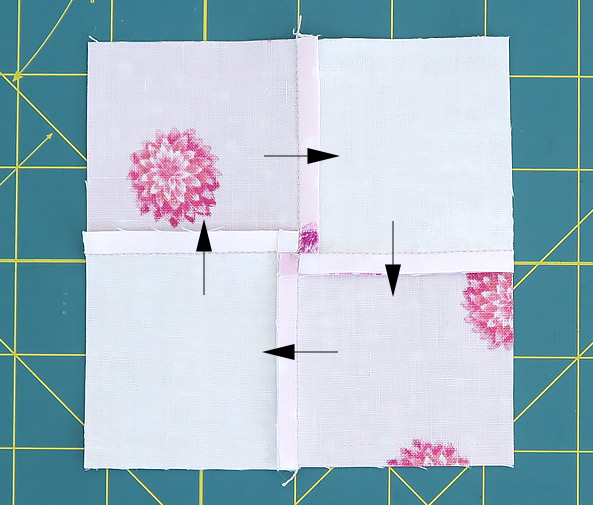
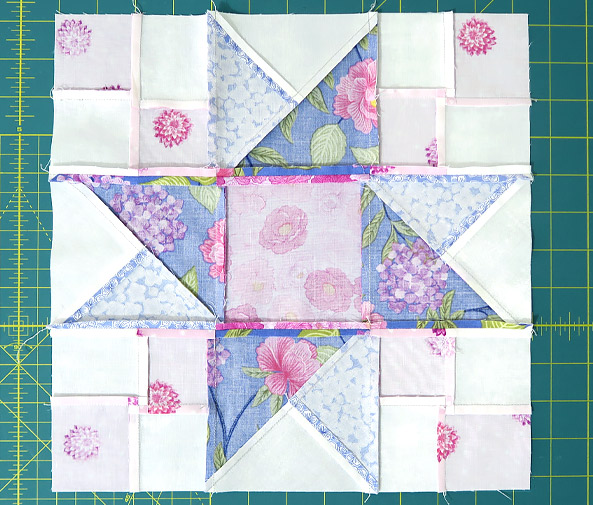
Now lay out all your units to make the Key Lime Pie block. This will help you sew everything together correctly.

Keeping your fabrics in order, sew them together one row at a time. Finger press your seams in the direction of the arrows and then fix with your iron.
Finally, join your rows together matching the centre points as you go. Then finger press your seams open and finally fix with your iron.
If you have sewn your block together accurately it should measure 12-1/2″ square but if you need to trim it make sure you leave 1/4″ seam allowance on all your points. Well done!… you have finished your eighth block.


