
Who doesn’t love a pinwheel? Fun at the fair, on the handlebars of your bike whizzing down hill, out of the car window (as long as Mum and Dad didn’t see…). Everyone loves pinwheels, right? Well, this classic quilting block has no less than five pinwheels, so have fun with this one.
BLOCK 6: Pinwheel
Finished Size 12″ (Unfinished 12-1/2″)

This month we are going to make a perfect pinwheel block. Not just perfect in size but as flat as possible too! Pinwheels are often overlooked as quilters worry about getting all those points to match in the centre and lay flat, but it really isn’t that hard. I will show you some great techniques to help you master this block and you’ll have five goes at perfecting your technique to make the finished design. So, follow me as I show you how to make perfect pinwheels.
CUTTING
I have chosen five different coloured fabrics for this block but you could use any number and combination of colours. Whatever you choose you’re sure to make perfectly peachy pinwheels with this method!
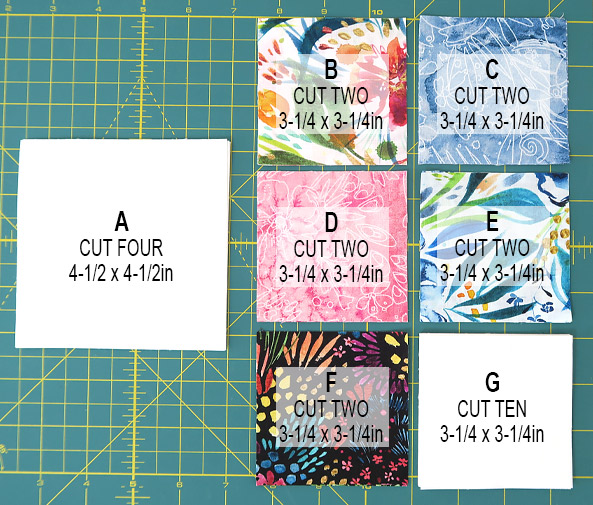
A. Four 4-1/2″ x 4-1/2″ squares (White)
B. Two 3-1/4″ x 3-1/4″ squares (Multi & White)
C. Two 3-1/4″ x 3-1/4″ squares (Blue)
D. Two 3-1/4″ x 3-1/4″ squares (Pink)
E. Two 3-1/4″ x 3-1/4″ squares (Blue & White)
F. Two 3-1/4″ x 3-1/4″ squares (Black)
G. Ten 3-1/4″ x 3-1/4″ squares (White)
In this block the background fabric is A & G.
BLOCK ASSEMBLY:
- All seams are 1/4″ and I use a stitch length of 1.8.
- As a rule, you would press your fabric seams towards the dark side (darker fabric). I finger press my seams before pressing with an iron. This allows you to change the seams’ direction if needed without stretching your fabrics.
- In bulky areas press your seams open as this will help reduce thickness.
As always, I will be making everything larger, then I will trim them so all your Pinwheels will be the same size. I am going to start with the Pink fabric D as it shows up well in my pictures, but you could choose any of your colours to begin. We will start by making Half Square Triangle’s (HST’s). You already know how to make these, but I will recap for you quickly below.
We are going to make two at a time from each of your fabric colours (B C D E & F) and white squares (G)
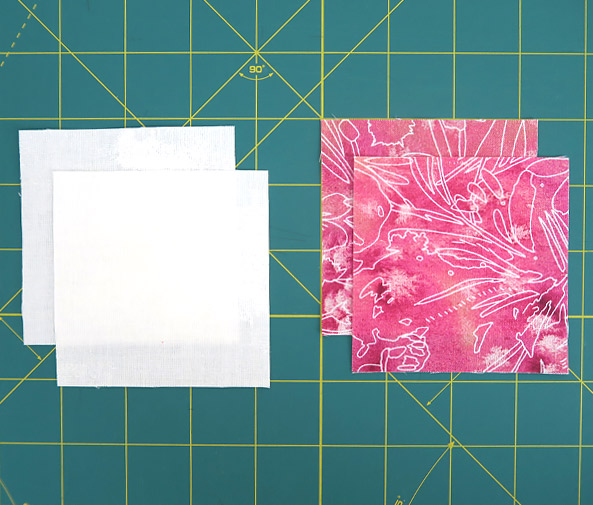
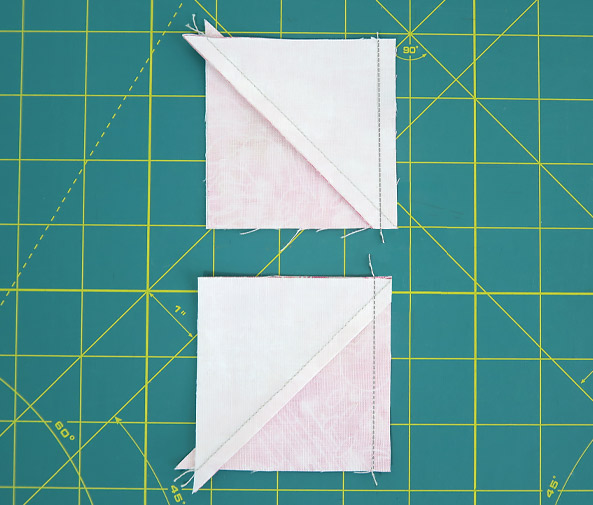
1. Draw a diagonal line on the wrong side of your 3-1/4″ x 3-1/4″ fabric G squares. Then take one of your coloured fabrics and place it right sides together (RST) with fabric G.
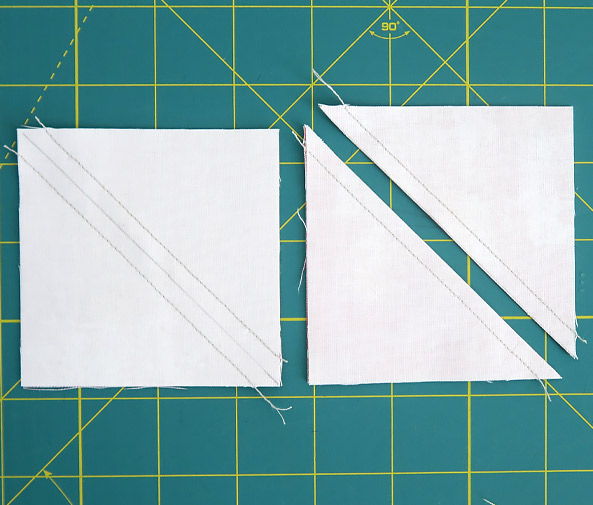
2. Sew 1/4″ away from each side of the diagonal line.
3. Cut apart on the marked line to make two HST’s.
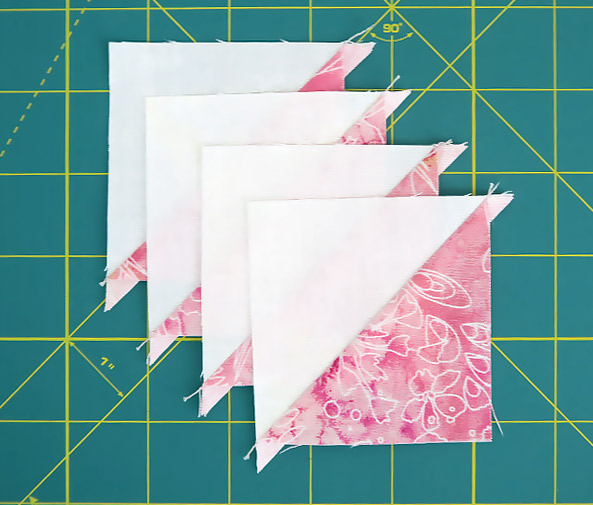
4. Open and finger press your seam to the dark side (this is important) and then set with an iron. We are not going to trim these units yet.
5. Now repeat this process to make two more identical HSTs, giving you four in total.
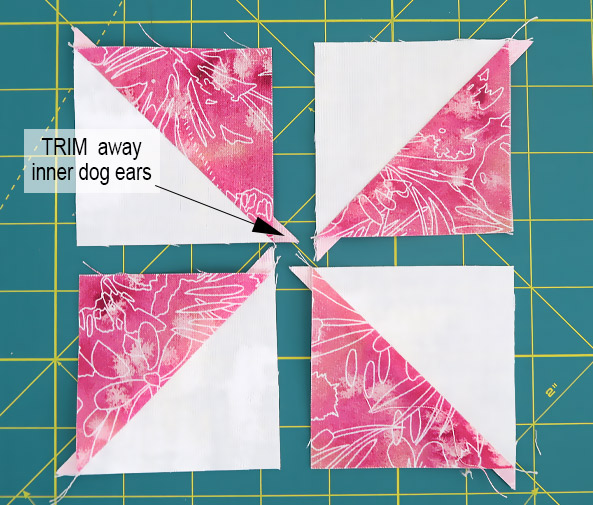
Now lay out your pinwheel unit to help you sew it together correctly. Make sure you do this with all your pinwheels, or you may find they are not all spinning the same way! Trim off the inner dog ears.
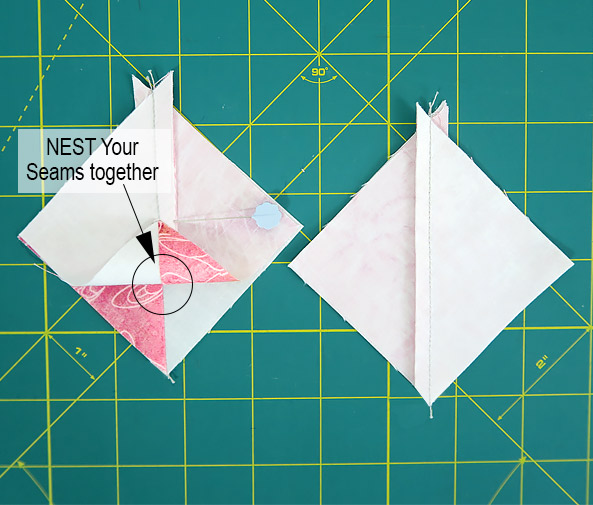
Place your top two units together with RST, line up your edges, nest your seams and sew together. Take care not to lose track of which side of the unit you are going to sew. It’s very easy to turn it and sew the wrong one. I put a pin in the side I need to sew so I don’t get lost.
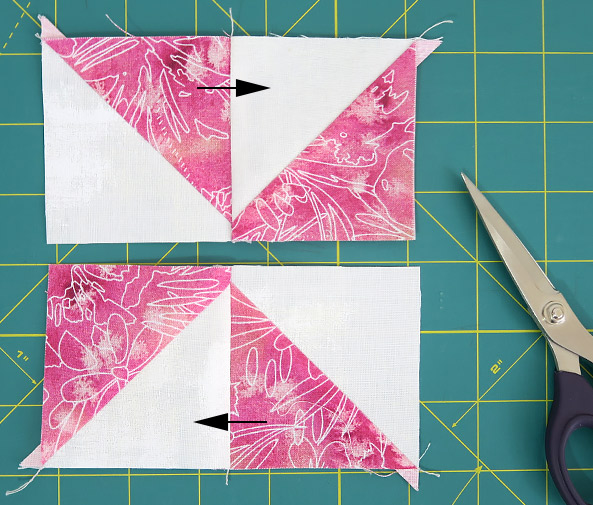
Repeat this step for the bottom two units. Then, open and finger press seams in the direction of the arrows in the picture above and set with an iron.
You often hear quilters say “nest your seams together”. If you wonder what this is, it simply means to line up your fabric seams so that they fit snugly together. This is done by pushing your seams towards each other until they won’t travel any more. They shouldn’t be on top of each other (you shouldn’t feel a lump or gap when you squeeze your seam together with your finger and thumb) but they should sit tightly side by side. These seams when sewn together will have a nice crisp seam line.
Next is how we get all our points to align in the centre.
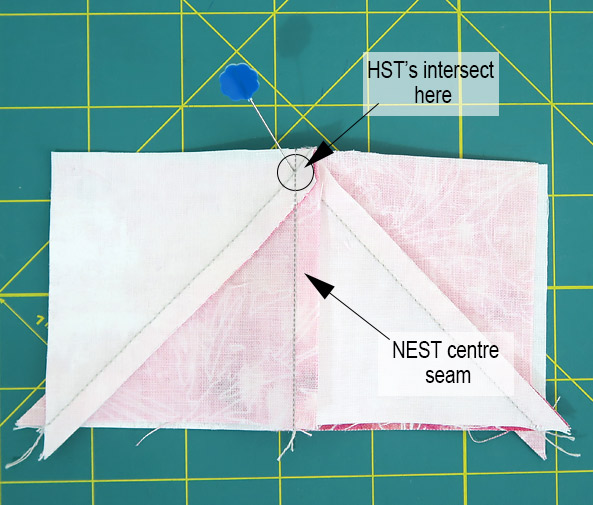
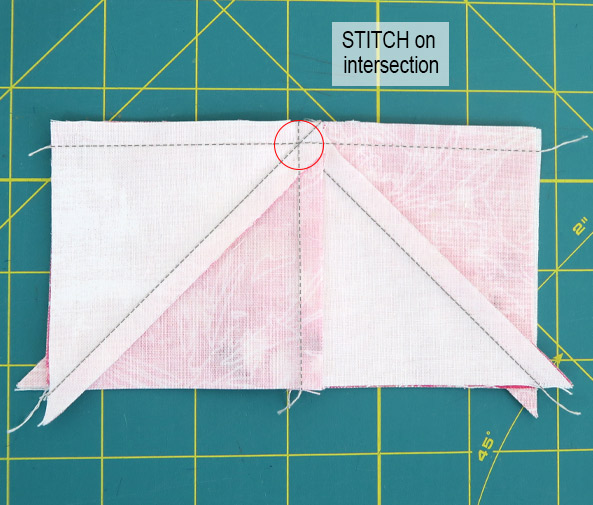
Take the top half of your unit and place a pin exactly where your four HST’s meet in the middle. Then pick up your bottom unit and with RST push the same pin into the bottom unit at the same point, aligning the sides of the two halves with each other as best you can. Keeping the pin in place (you may find it easier to push the pin as far as it will go into the fabric) nest your centre seam together. Still keeping the pin in place, sew the two units together, removing the pin just before you get to it and stitching over where the pin had intersected all the points.
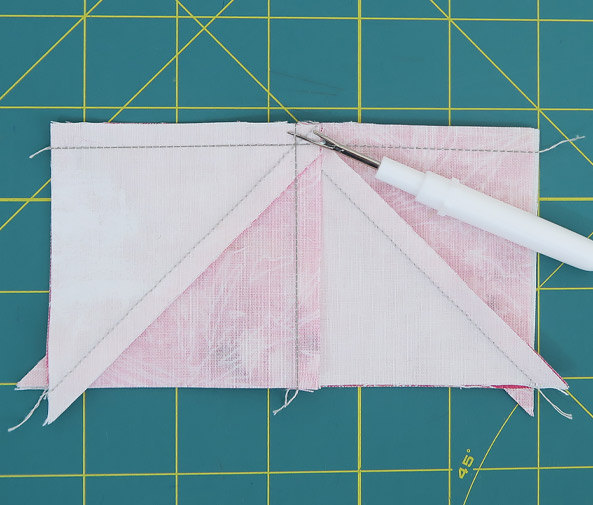
Before you open your pinwheel take your seam ripper and unpick the two or three stitches that lie above your horizontal seam, don’t cut them just unpick them. Do the same on the other side.
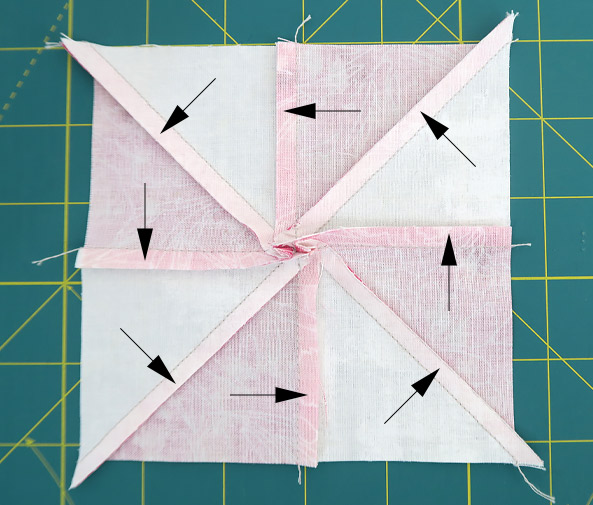
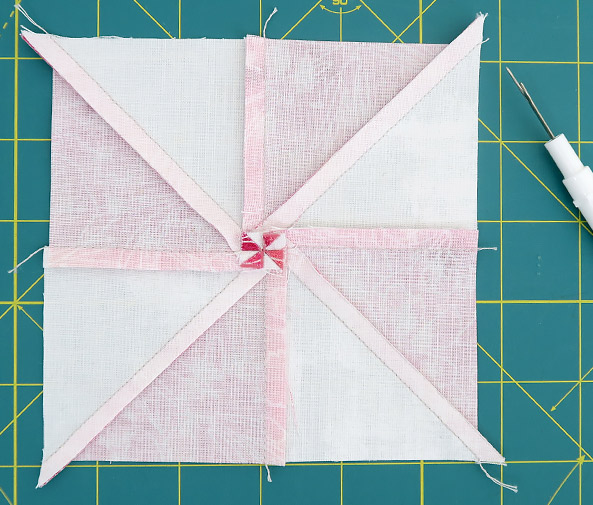
Turn your pinwheel over. All your seams should be pointing in an anti-clockwise direction. Now press your block in a circle as you get closer to the centre your seams should fall open to make a small pinwheel in the middle. Press flat.
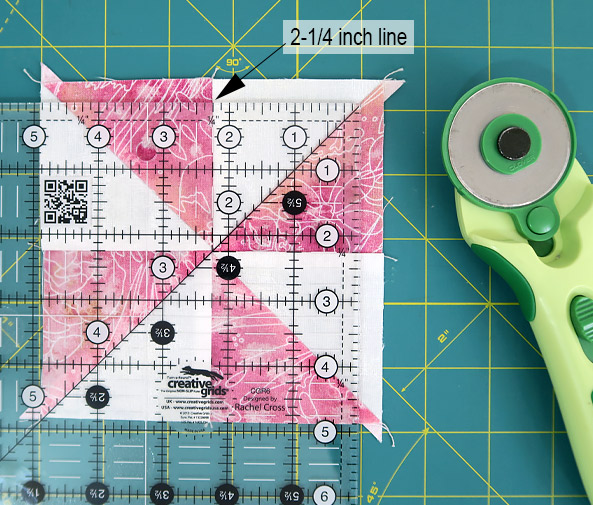
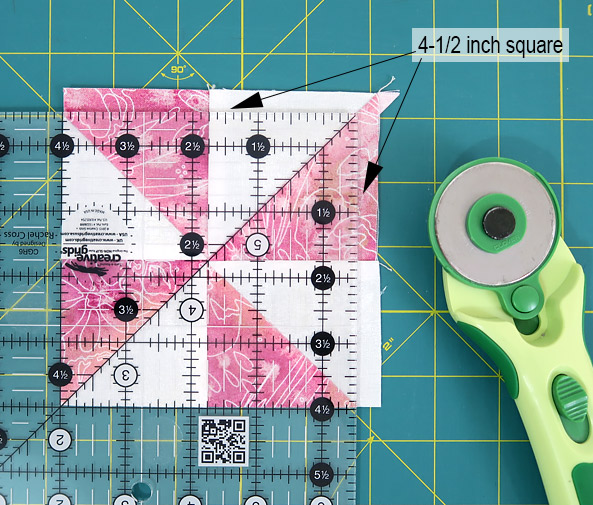
Next, trim your pinwheel to 4-1/2″ square. Place your ruler’s 2-1/4″ line on the centre line of your pin wheel and trim. Repeat on all four sides. See images above.
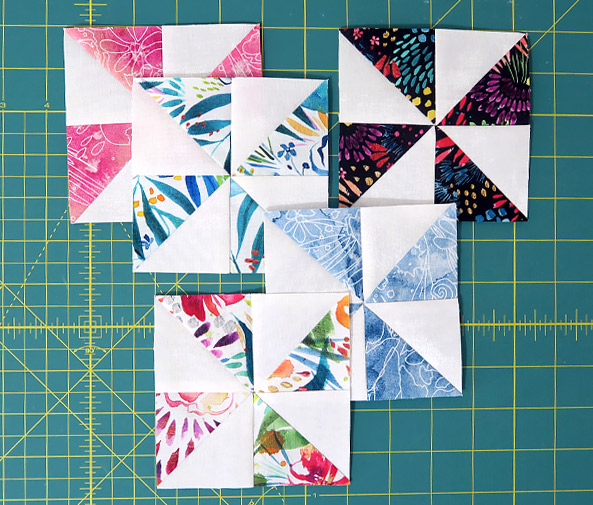
Now that you have completed your first pinwheel, use the same method to make four more using your other coloured fabrics.
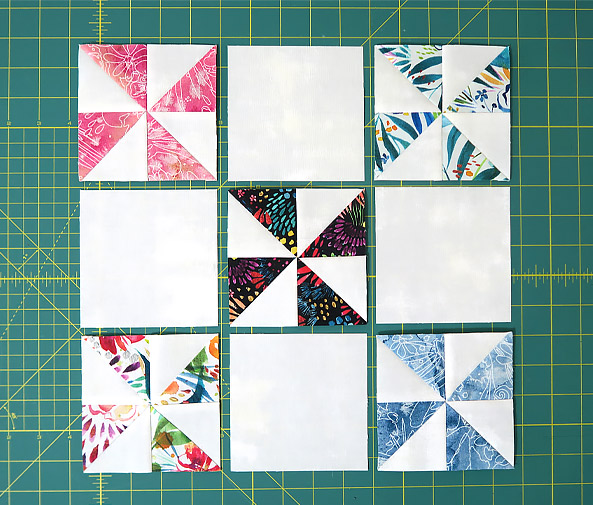
When you have completed all five pinwheels, lay them all out to form the pinwheel block to help you sew everything together correctly.
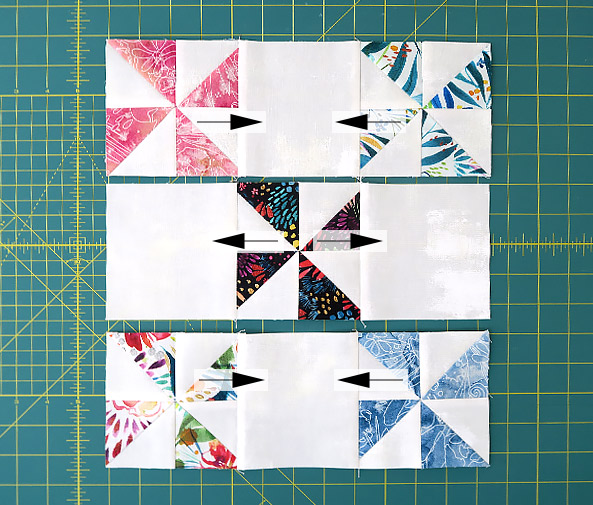
Keeping your fabrics in order, sew them together one row at a time, pressing your seams in the direction of the arrows as you go (see image above). Then join your rows together, taking care to match your pinwheels’ points as you go. Finally press your seams open.
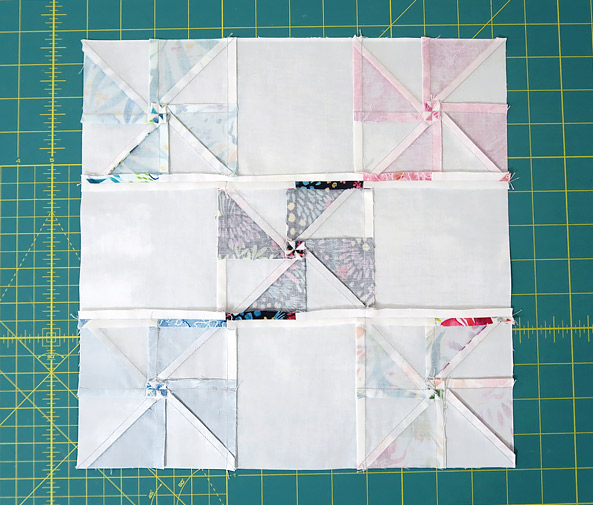
If you have sewn your block together accurately it should measure 12-1/2″ square but if you need to trim it make sure you leave 1/4″ seam allowance on all your points.
Olé!… you have finished your sixth block.

