
Well, you are really coming along now as it’s time for Block 5 of our Sew Along. This pretty block is intricate, but actually not too complicated, especially with all the tricks and skills we have already covered getting to here.
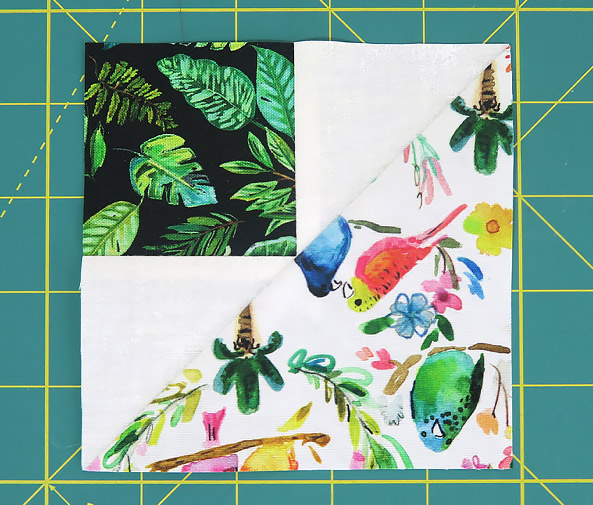
BLOCK 5: Five Spot
Finished Size 12″ (Unfinished 12-1/2″)
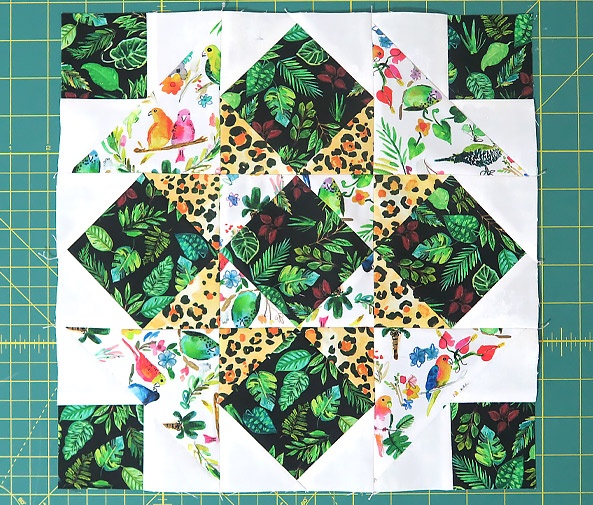
Five Spot is this month’s block and I’m going to show you how I made mine. This quilt block is a nine-patch block that has been made using both ‘half square triangles’ and ‘square in a square’ units that are set on-point. We will be using the stitch and flip method for the square in a square units for accuracy.
CUTTING
There are a few triangles in this block and if you have trouble with them stretching there are some things you can try. 1. Use a quilter’s spray starch like Best Press, which won’t leave any nasty residue behind. Spray lightly on one side then press dry, then turn your fabric and do the same to the other side. If it is still not stiff enough, repeat the process. 2. Press, don’t iron – by pressing I mean holding the iron still on your fabric for a few seconds without moving it up and down or side to side, then lifting it and placing it in another area. Don’t move your iron around as if you were ironing a shirt (if you can remember what this is like…) as this will stretch your fabrics. 3. Handle your fabrics as little as possible and treat them gently when you do.
You will need three, contrasting fabrics for this block – I chose a really dark fabric for the Spots. I’m sure whatever you choose your block will look fabulous.
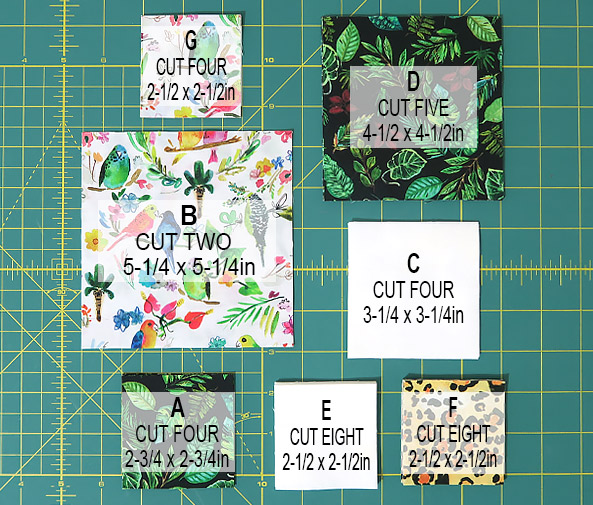
A. Four 2-3/4″ x 2-3/4″ squares (Black)
B. Two 5-1/4″ x 5-1/4″ squares (Birds)
C. Four 3-1/4″ x 3-1/4″ squares (White)
D. Five 4-1/2″ x 4-1/2″ squares (Black)
E. Eight 2-1/2″ x 2-1/2″ squares (White)
F. Eight 2-1/2″ x 2-1/2″ squares (Spots)
G. Four 2-1/2″ x 2-1/2″ squares (Birds)
In this block the background fabric is E & C.
BLOCK ASSEMBLY:
- All seams are 1/4″ and I use a stitch length of 1.8.
- As a rule, you would press your fabric seams towards the dark side (darker fabric). I finger press my seams before pressing with an iron. This allows you to change the seams’ direction if needed without stretching your fabrics.
- In bulky areas press your seams open as this will help reduce thickness.
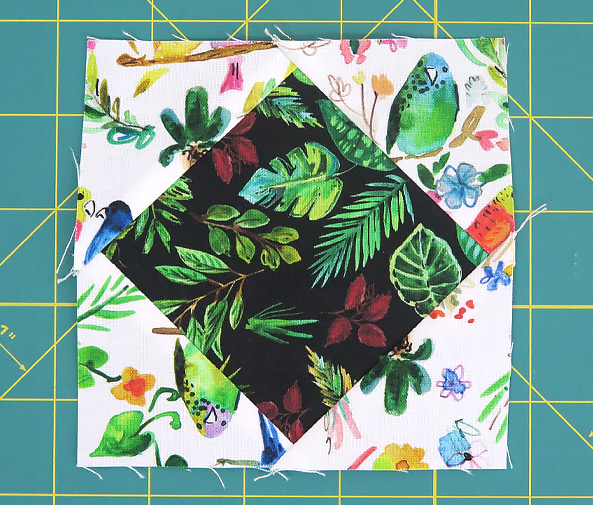
We are going to start by making the top left-hand unit of the quilt block. We are going to make this slightly larger and then trim to size.
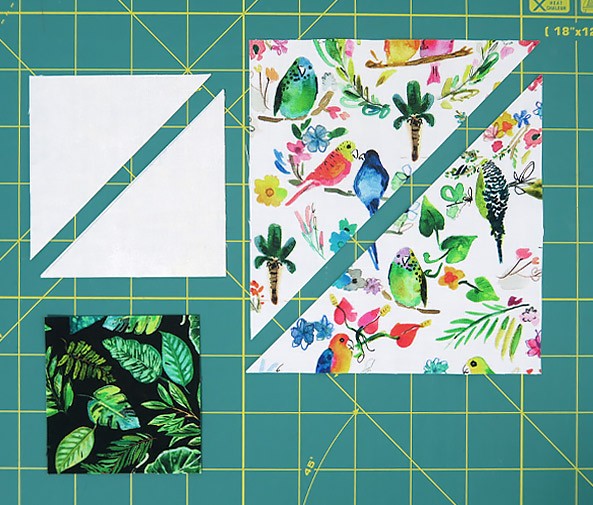
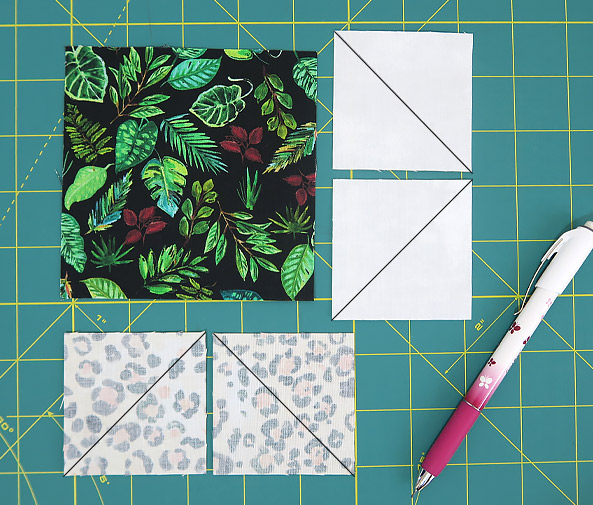
For the top left-hand corner unit you will need one 2-3/4″ x 2-3/4″ square fabric (A). One 5-1/4″ x 5-1/4″ square fabric (B) and one 3-1/4″ x 3-1/4″ fabric (C). Now cut fabric B and C diagonally from corner to corner.
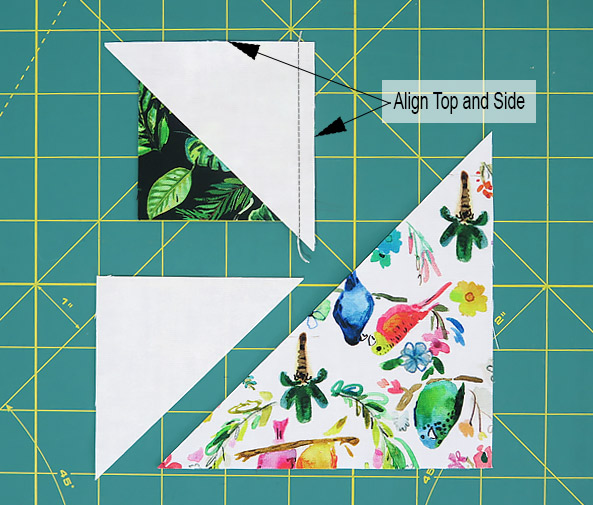
Lay out the top left-hand fabrics in order so that you stitch everything together correctly.
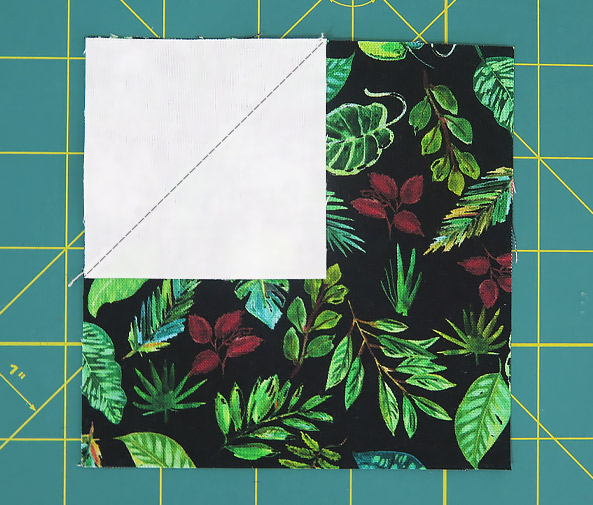
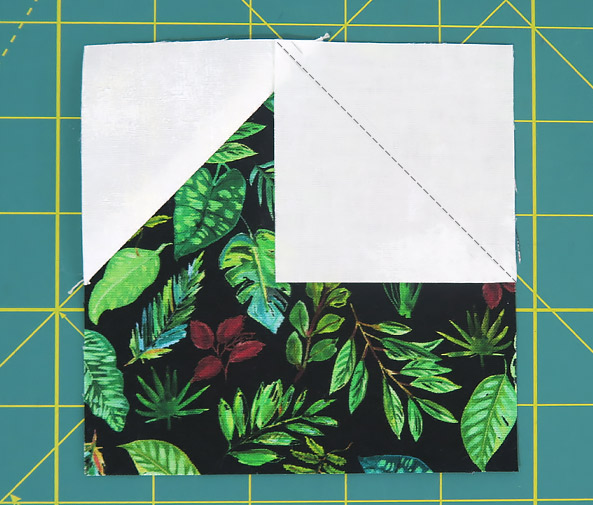
First take the top right triangle (white) and place it on top of the black square. With right sides together (RST) aligning the top and right-side edges, stitch down the right-hand side.
Then open up your fabrics and finger press your seam towards the white triangle, being careful not to stretch your fabrics, then fix with your iron.
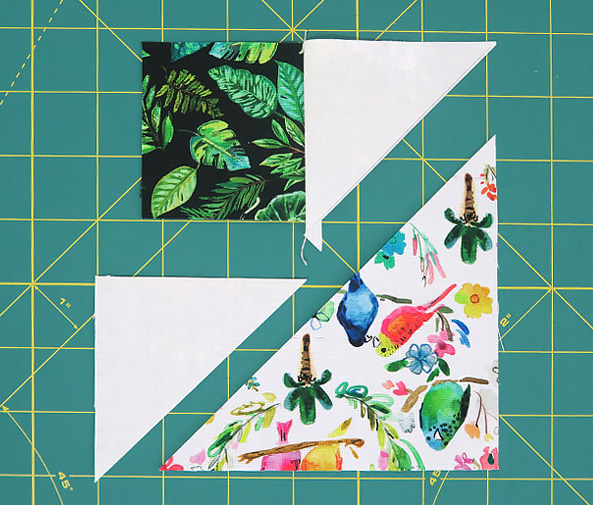
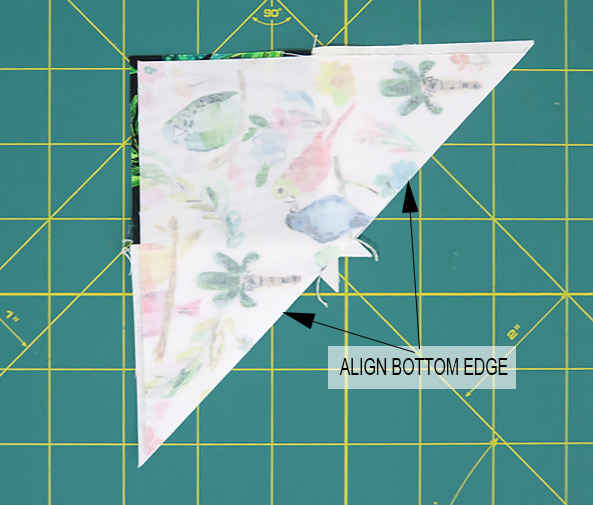
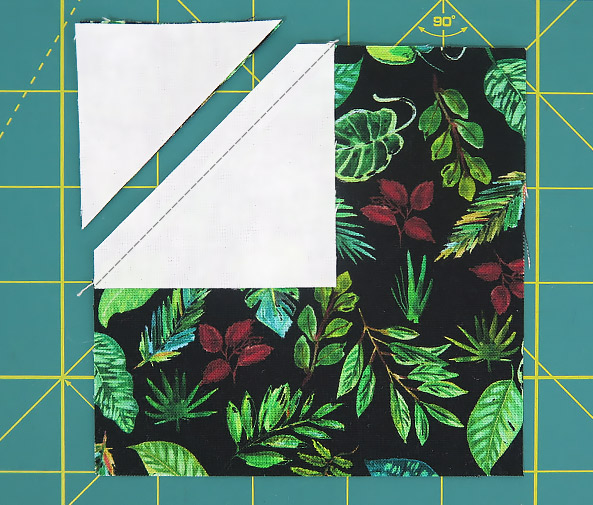
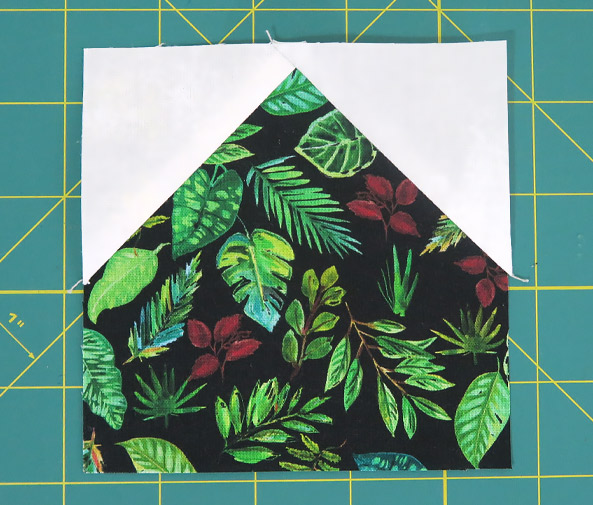
Next repeat with the bottom left triangle (white) but this time align the left and bottom edges of the fabrics with the black square and sew along the bottom edge.
Now open your fabrics and finger press your seam towards the bottom white triangle taking care not to stretch your fabrics, then press with an iron. You now have two triangles
NB: These triangles are not the same size.
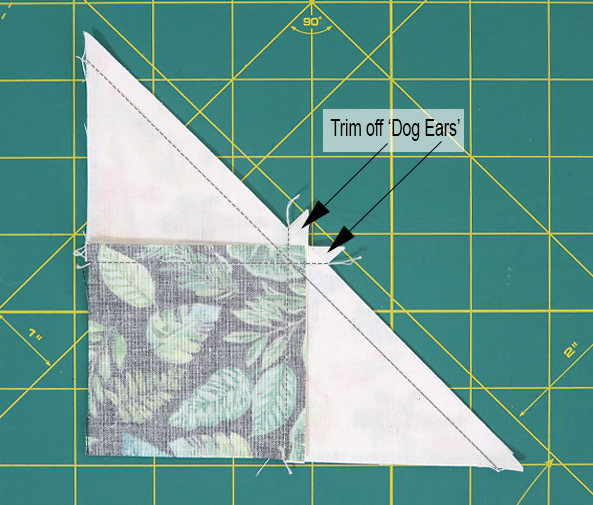
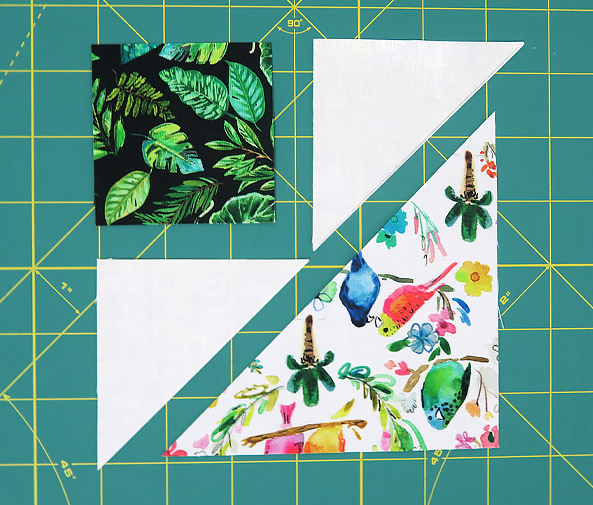
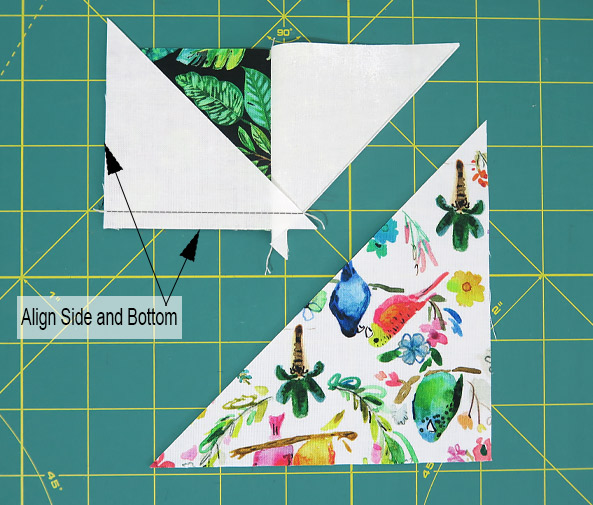
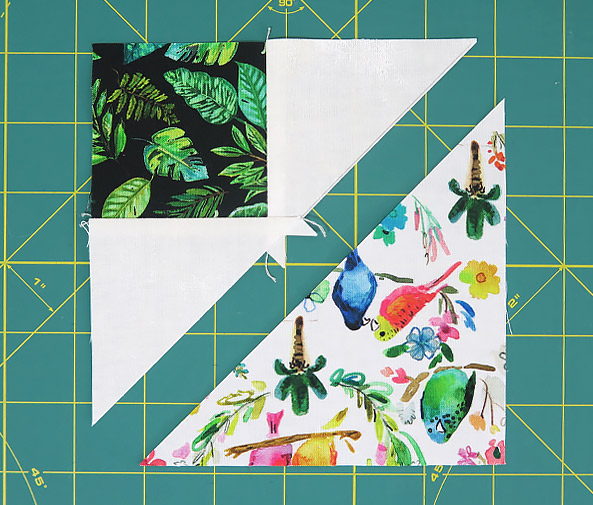
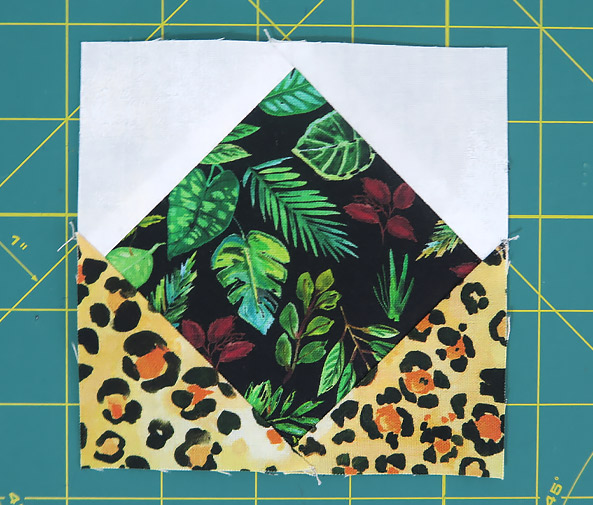
Place your two large triangles RST making sure you centre and align the longest edges of the triangles. Sew the triangles together being careful not to lose the corner of your square. When you sew diamonds or triangles together you almost always end up with little points of fabrics that are known by quilters as ‘dog ears’ and we need to remove them as they will add extra bulk to our seams. Now open your unit and press the seam towards the large bird triangle.
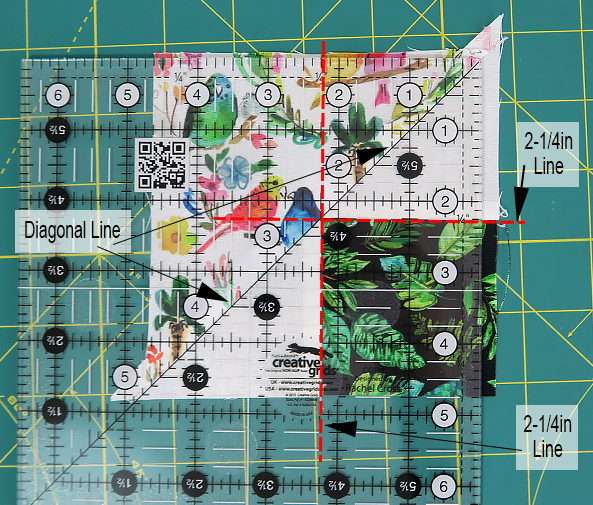
Now we need to trim our block down to 4-1/2″ square. Place your ruler with the diagonal line running along the centre seam. Then make sure your ruler is lined up against your corner square so that the seam runs along the 2-1/4″ line vertically and horizontally. Trim the right and top sides.
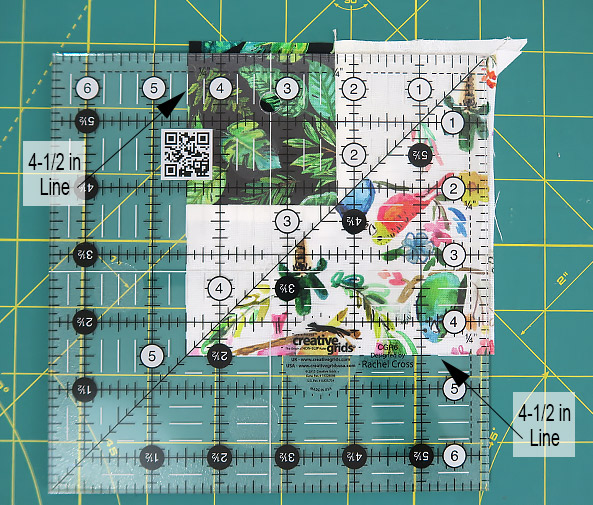
Next turn your block around and line up your square so that left and bottom sides sit on the 4-1/2″ line and trim away the remaining excess fabrics.
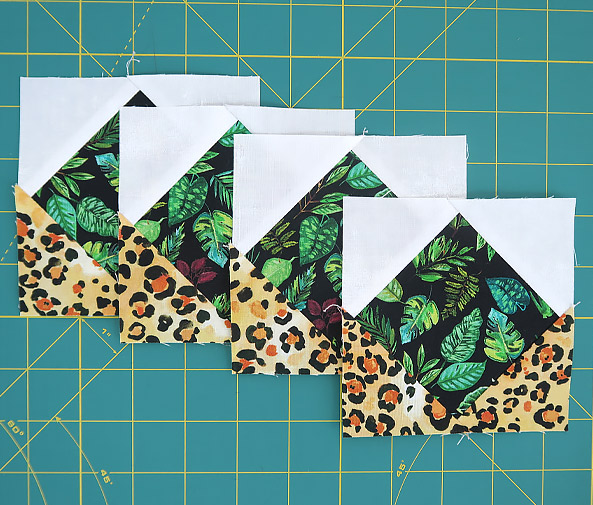
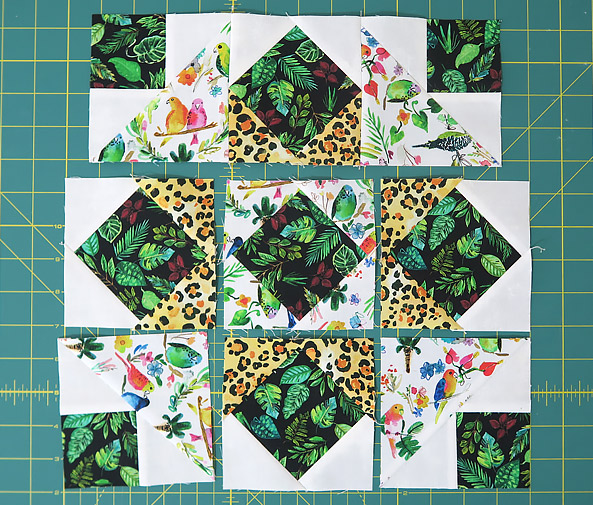
Now make three more.
We are now going to use the ‘stitch and flip’ method to make the remaining on point ‘square in a square’ units. Take one 4-1/2″ black square (D). Two white 2-1/2″ squares (E) and two spot 2-1/2″ squares (F). Draw a diagonal line on the white and spot squares.
Take one white square and place right sides together with the black square in the top left hand corner. Align the edges and sew on top of your diagonal line then trim away the excess fabric leaving a 1/4″ seam. Then open out your fabric and finger press your seam open, being careful not to stretch your fabric, then fix with an iron.
Then repeat this process with your second white square, trimming away the excess fabric and finger pressing open before fixing with the iron. This really does help stop the stretch. Now repeat with your two Spot fabrics on the opposite corners of the unit.
Make three more. Finally take the remaining fabrics and repeat the process for the last central unit.

Now lay out all your units to make the Five Spot Block to help you sew everything together correctly.
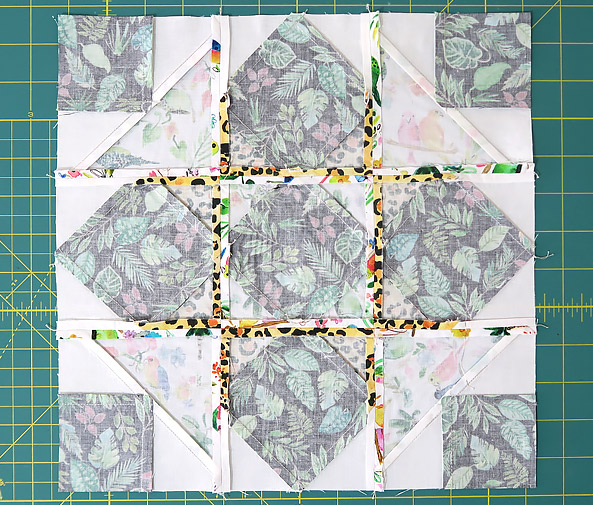
Keeping your fabrics in order, sew them together one row at a time. Take care to match your points in the middle row and press all your seams open. Finally join your rows together matching your points as you go and again pressing your seams open.
If you have sewn your block together accurately it should measure 12-1/2″ square but if you need to trim it make sure you leave 1/4″ seam allowance on all your points.
Woohoo!… you have finished your fifth block.

