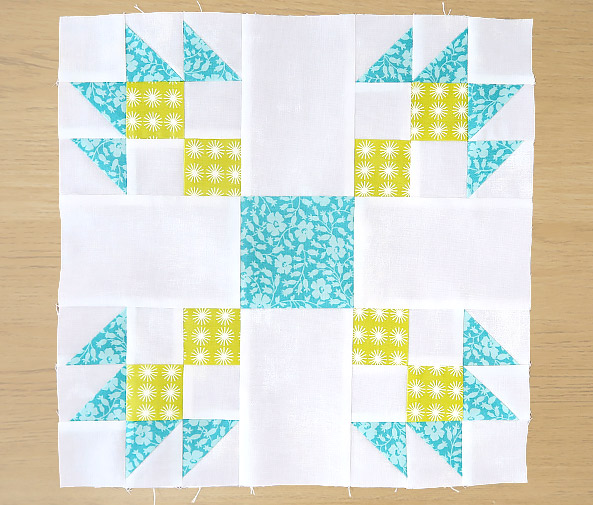
As you will surely know by now, many Quilt Blocks are named for their appearance and Bear Paw is no exception. That’s just what it looks like. We don’t see too many bears out and about here in the UK, but don’t let that stop you making a super Bear Paw Quilt Block here with us.
BEAR PAW QUILT BLOCK
Finished Size 12″ (Unfinished 12-1/2″)
Bear Paw is our twelfth quilt block. This traditional quilt block is an uneven seven patch block that has many variations. It is made from squares, rectangles and half square triangles
CUTTING
You will need two fabric colours for this block as well as the background fabric.
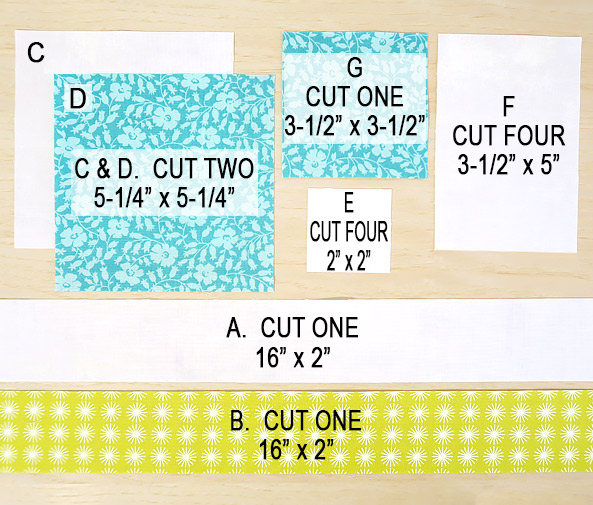
A. One 16″ x 2″ strip (white)
B. One 16″ x 2″ strip (lime)
C. Two 5-1/4″ x 5-1/4″ squares (white)
D. Two 5-1/4″ x 5-1/4″squares (turquoise)
E. Four 2″ x 2″ squares (white)
F. Four 3-1/2″ x 5″ rectangles (white)
G. One 3-1/2″ x 3-1/2″ square (turquoise)
The background fabrics for this block are A, C, E & F.
BLOCK ASSEMBLY:
- All seams are 1/4″ and I use a stitch length of 1.8.
- As a rule, you would press your fabric seams towards the dark side (darker fabric) but not always. I finger press my seams before pressing with an iron. This allows me to change the seams’ direction if needed without stretching my fabrics.
- In bulky areas press your seams open as this will help reduce thickness.
We are going to begin by making all four, four patch units. We are going to use ‘strip sets’ to make the four patch or checkerboard units that sit in the corners. There will be a lot less cutting using this method.
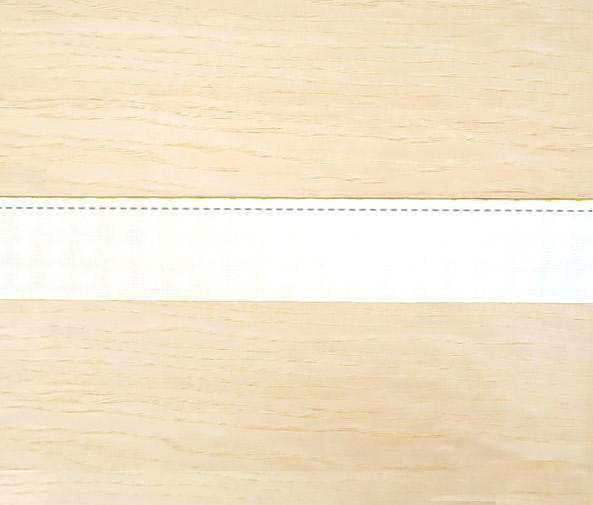

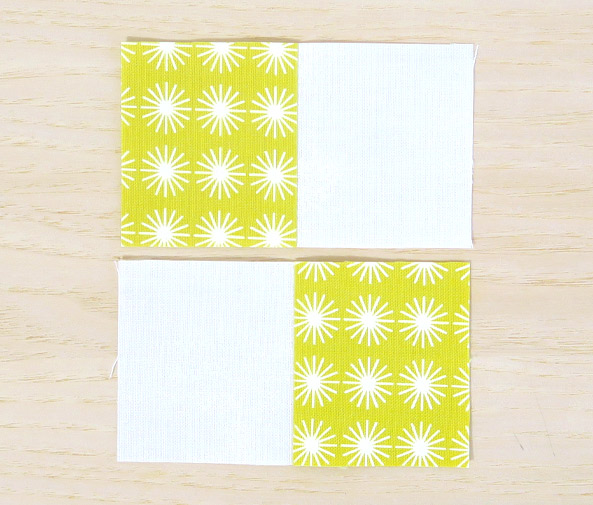
Take your two 16″ x 2″ fabric strips A and B and place right sides together (RST). Now pin along the length of your strips aligning your edges as you go. This will help stop your fabrics from traveling as you sew. Now stitch along the length of your fabrics. When finished finger press your seam towards the dark side (darker fabric) before fixing the seam in place with your iron.
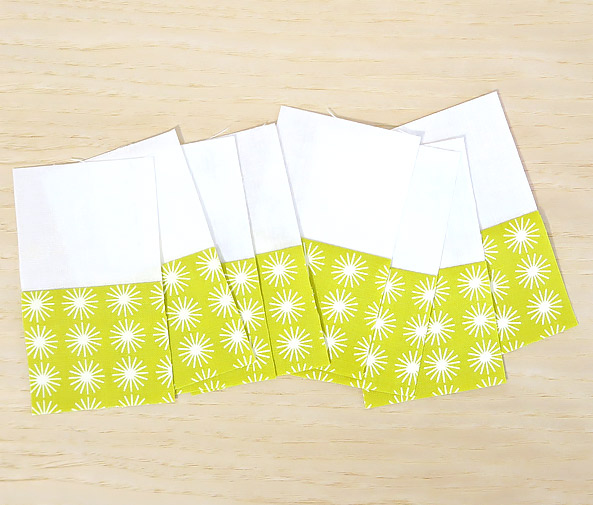
Line up your ruler along the seam line and cut your unit across the rows into eight 2″ units.

Take two of your units and place RST lining up the edges and nesting your seams then sew along the top edge.
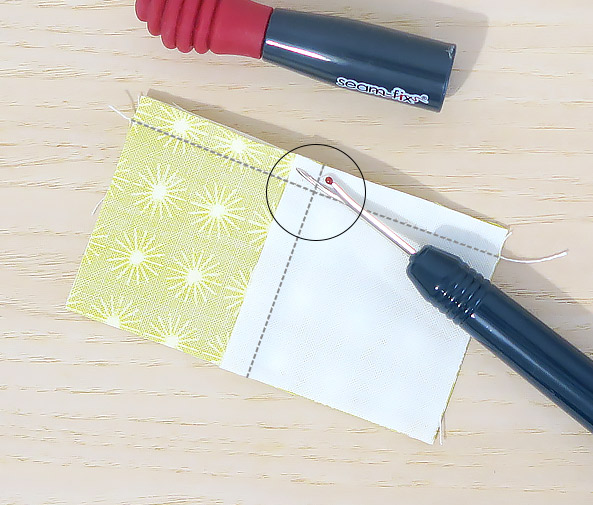
Before you open your four patch take your seam ripper and unpick the two or three stitches that lie above your horizontal seam. Don’t cut them, just unpick them. Do the same on the other side.
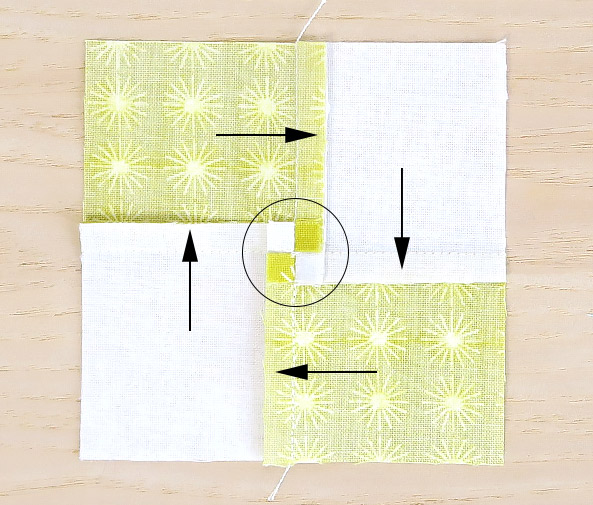
Turn your four patch with the wrong side facing up and finger press your seams in a clockwise direction. As you get closer to the middle your seams should fall open to make a mini four patch in the centre. Press flat with your iron.
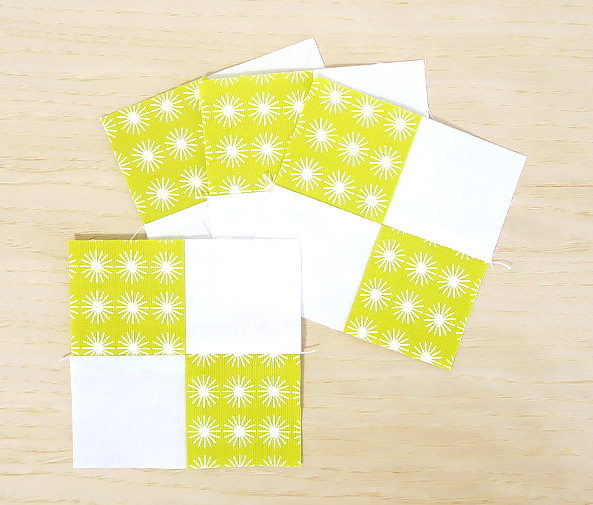
Now make three more identical four patch units.
We are going to make the claws of our Bear Paw block making eight Half Square Triangles (HST) at once using the ‘Eight at a Time’ method, also known as ‘Magic 8’. These HST aren’t quite as stretchy as the ‘Four at a Time’ HST as all the edges of these triangles are cut with the fabrics straight of grain on their edges instead of on the bias. We are going to make them slightly larger and then trim them to size for accuracy. This is a great method for making multiple HST.
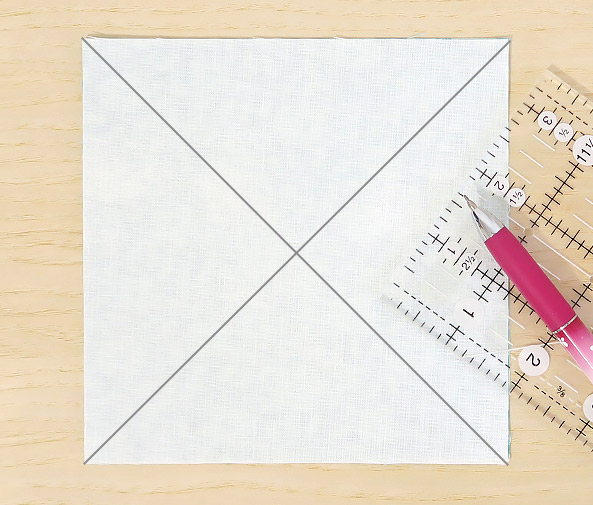
Take one of your 5-1/4″ x 5-1/4″ white fabric squares C and draw two diagonal lines on the wrong side from corner to corner. Then place on top of your 5-1/4″ x 5-1/4″ turquoise fabric square D with right sides together (RST).
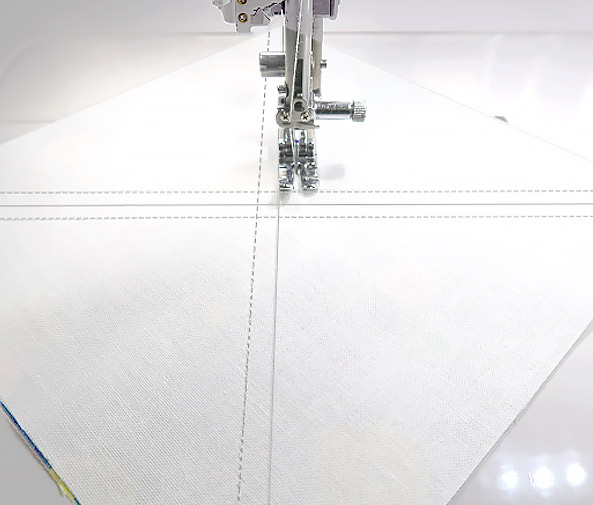
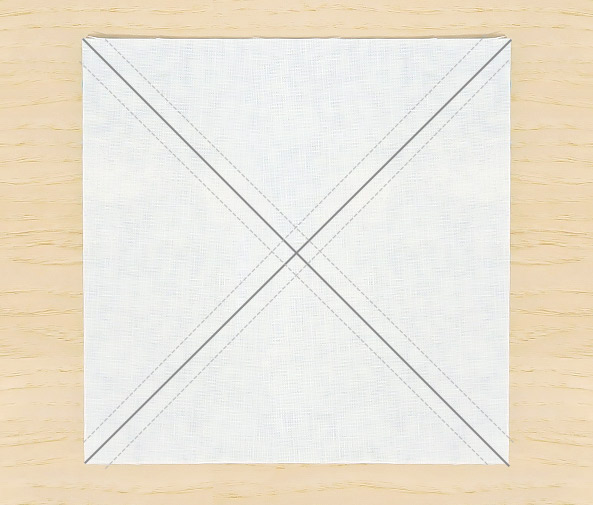
Line up your edges and pin your fabrics together to stop them from shifting and sew 1/4″ away from each side of both your diagonal lines. You should now have four stitched lines.
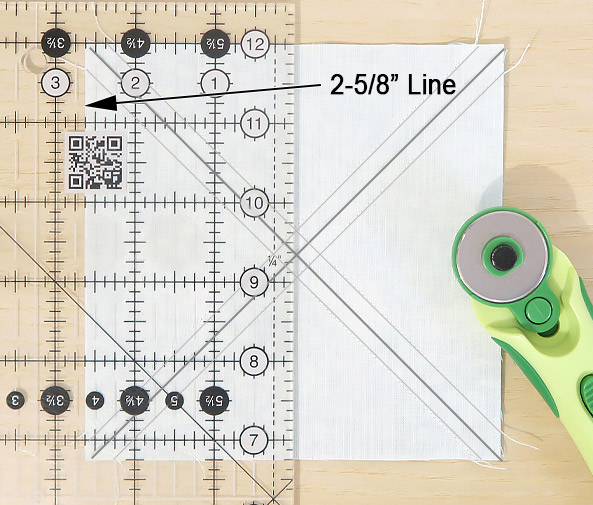
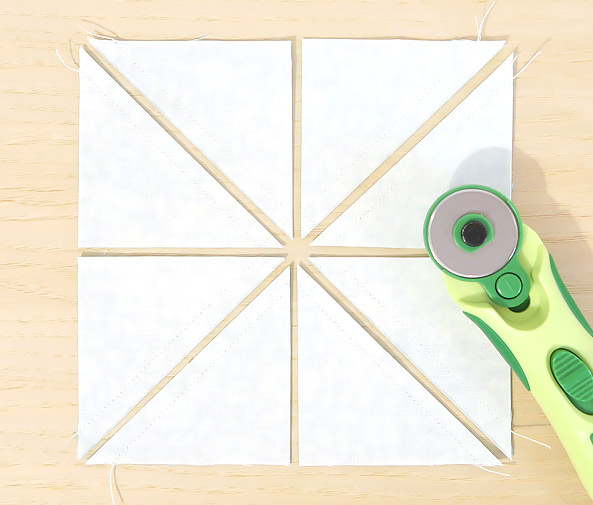
Next cut your 5-1/4″ unit in half through its centre point. Your ruler’s 2-5/8″ line should run along its edge. Then repeat Horizontally. Check your ruler is straight and centred before cutting.
Finally cut along your drawn diagonal lines. You should now have eight HST.
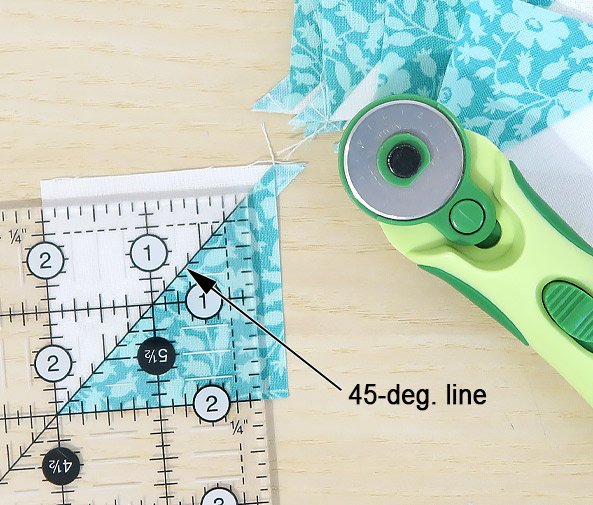
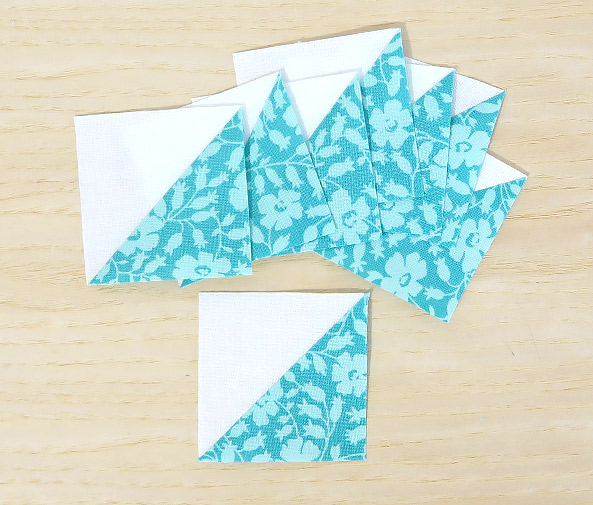
Open one of your HST and finger press your seam to the dark side and set with an iron. Then trim to 2″ square by placing your ruler’s 45° diagonal line along your seam line, squaring up your block, and trimming away the excess fabric. Now repeat until you have eight perfect HST.
Now take your remaining 5-1/4″ x 5-1/4″ squares C and D and repeat to make a total of sixteen HST.
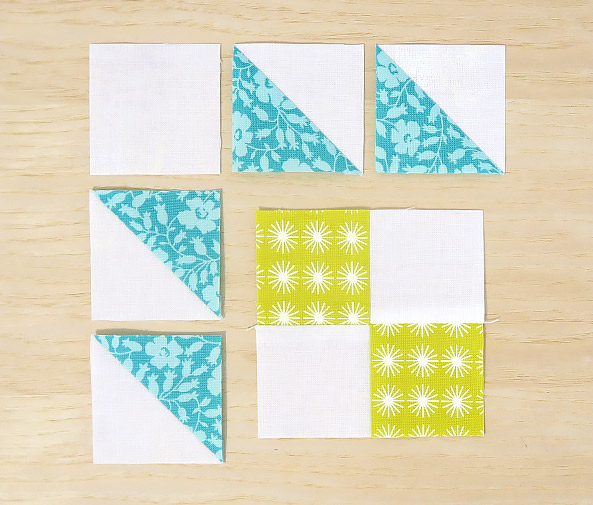
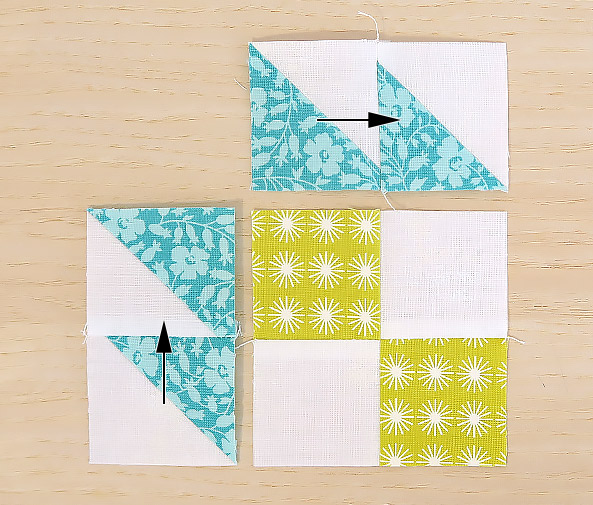
Lay out your top left-hand corner making sure your four patch unit and your HST are all facing the right way.
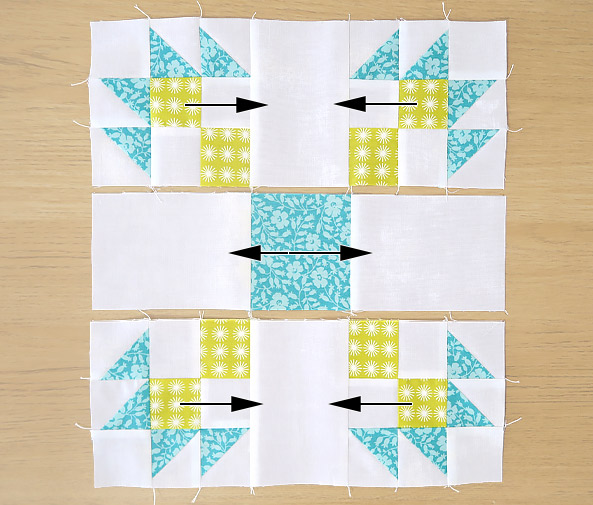
Then sew together your top and side HST making sure you finger press your seams in the direction shown in the middle image before setting with your iron.
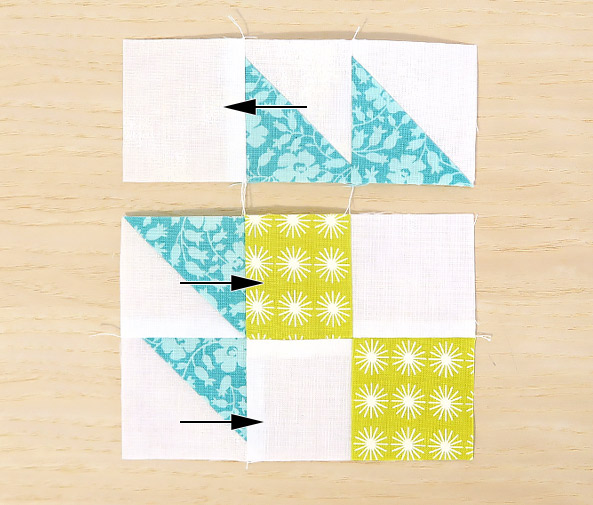
Sew your unit together in rows making sure you nest your seams and match your points. Then finger press your seams in the direction of the arrows (right image) before setting with your iron.
Now sew your rows together – don’t forget to match your points. Then finger press your seams up away from your four patch before fixing with your iron.
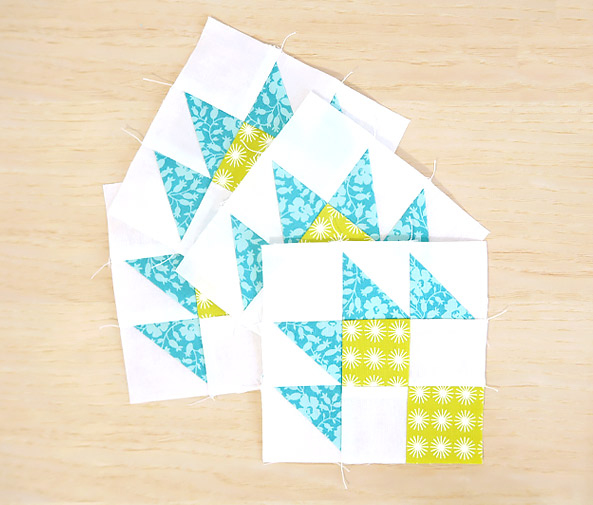
Now make three more identical units.
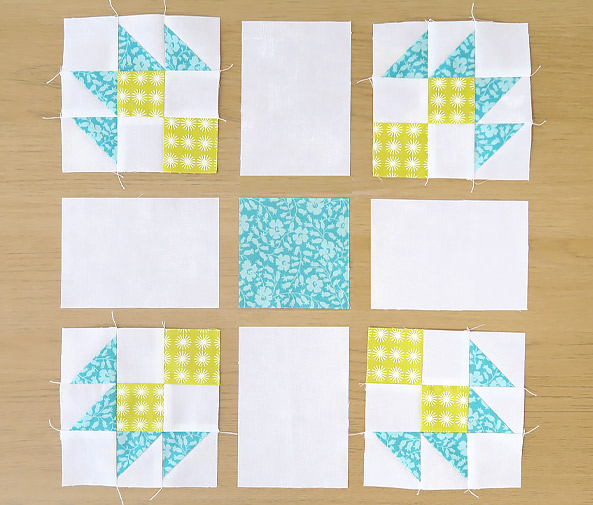
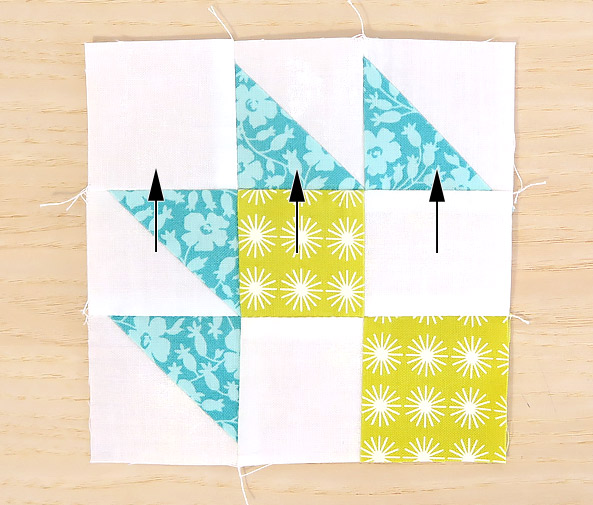
Lay out all your units to form the Bear Paw quilt block.
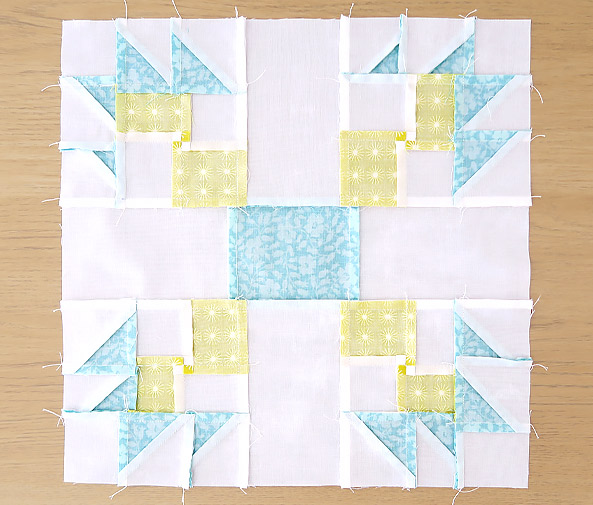
Keeping your fabrics in order sew your block together one row at a time. Finger press your seams in the direction of the arrows (left image) before fixing with an iron. Finally join your rows together matching your points as you go and then press your seams towards the centre
If you have sewn your block together accurately it should measure 12-1/2″ square but if you need to trim it make sure you leave 1/4″ seam allowance on all your points.
Well done you have just finished your penultimate block!

